API Communication Logging
Overview
Shopify Connect includes comprehensive logging of all API communications between Business Central and Shopify. This helps troubleshoot integration issues, audit data exchanges, and monitor API usage.
Prerequisites
None - logging functionality is available immediately after installation.
Configuration
Task 1: Configure Logging Mode
-
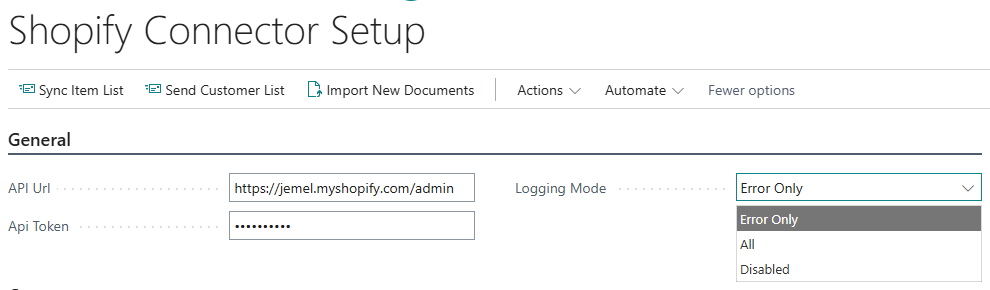
Choose the 🔎 icon, enter Shopify Setup, and then choose the related link.
-
On the General fastTab, set Logging Mode:
-
Error Only - Log only API errors (recommended for production)
-
All - Log all API requests and responses (use for troubleshooting)
-
Disabled - No logging (not recommended)
-
-
Press OK to save.
Recommendations:
-
Use All during initial setup and testing
-
Switch to Error Only for production to reduce database growth
-
Use All temporarily when troubleshooting issues
Viewing Log Entries
Task 1: Open Log Entries List
-
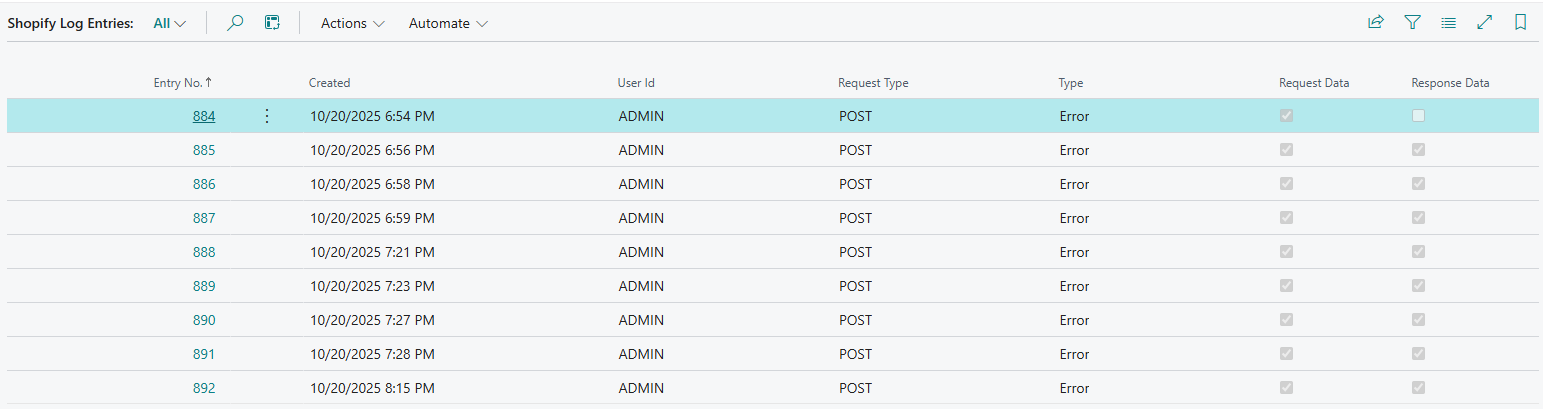
Choose the 🔎 icon, enter Shopify Log Entries, and then choose the related link.
-
The list shows:
-
Entry No. - Unique log entry number
-
Created - Date and time of API call
-
User ID - User who triggered the action
-
Request Type - HTTP method (POST, PATCH, DELETE)
-
Type - Message (success) or Error
-
Request Data - Shows "(BLOB)" if contains request JSON
-
Response Data - Shows "(BLOB)" if contains response JSON
-
-
Filter entries by:
-
Date range using Created field
-
Type = Error to see only errors
-
User ID to see logs for specific user
-
Request Type to see specific operations
-
Task 2: View Log Entry Details
-
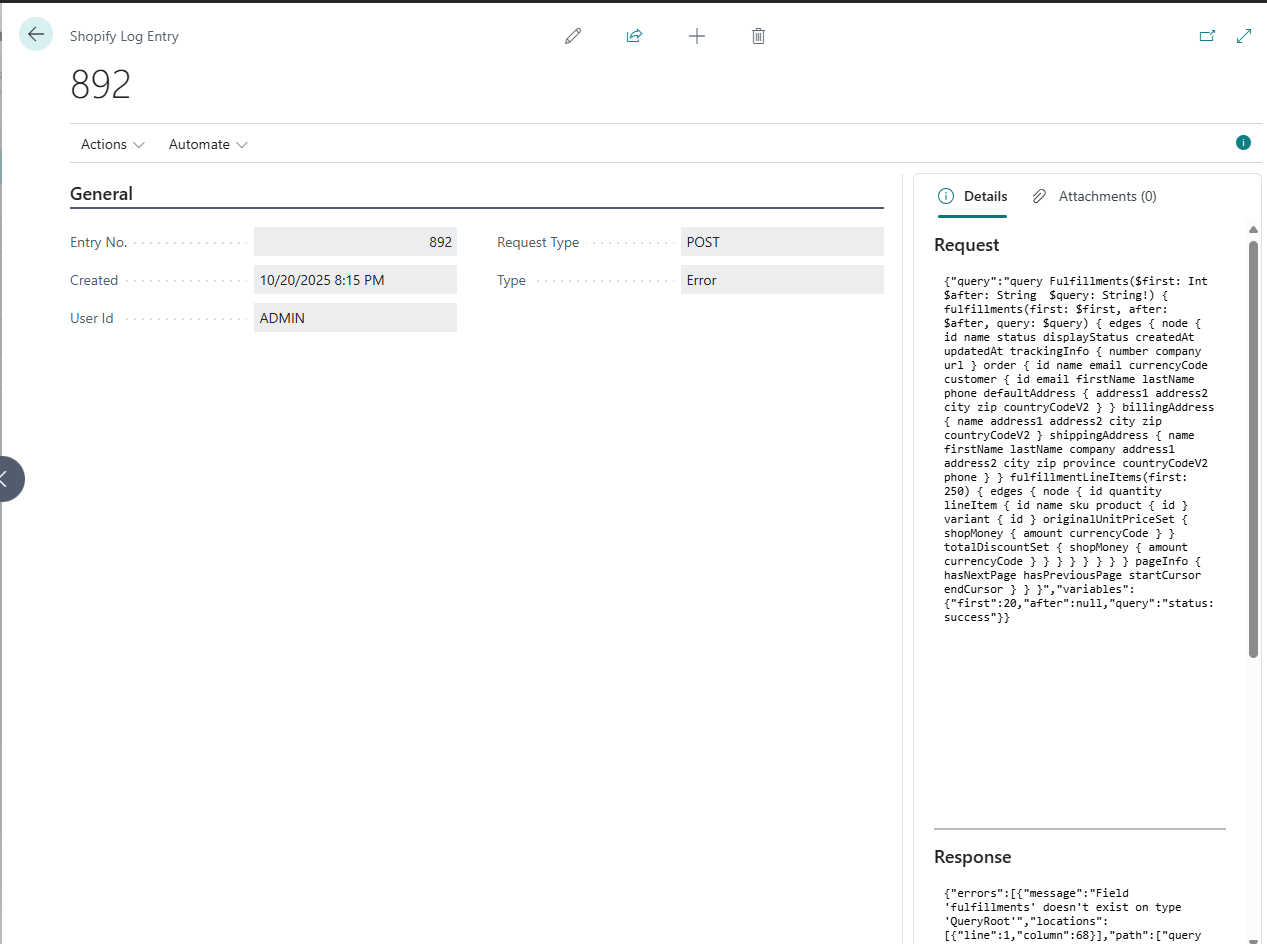
In Shopify Log Entries list, select an entry and press Enter or double-click.
-
The Shopify Log Entry Card opens showing:
-
Header information (Entry No., Created, User ID, Request Type, Type)
-
Request Viewer factbox - Formatted JSON request sent to Shopify
-
Response Viewer factbox - Formatted JSON response received from Shopify
-
-
Use the JSON viewers to:
-
Expand/collapse JSON nodes
-
Copy specific values
-
Analyze request parameters
-
Review error messages
-
Task 3: Download Request/Response
-
In Shopify Log Entry Card, press Actions → Functions
-
Select:
-
Download Request - Save request JSON as text file
-
Download Response - Save response JSON as text file

-
-
Choose location and filename to save.
-
Open file in text editor or JSON viewer for detailed analysis.
Understanding Log Entries
Successful API Calls
Type: Message
Characteristics:
-
Response Data contains valid JSON
-
HTTP status code 200-299 (not shown, but implied by success)
Example Request Types:
-
POST- Creating data (products, customers, fulfillments) -
PATCH- Updating data -
DELETE- Deleting data
Failed API Calls
Type: Error
Common Error Scenarios:
Authentication Error
Symptoms: Response contains "Unauthorized" or "401"
Solutions:
-
Verify API Token is correct
-
Check Shopify custom app is installed
-
Verify API scopes are configured
Rate Limiting
Symptoms: Response contains "429" or "Throttled"
Solutions:
-
System automatically retries after delay
-
Reduce Job Queue frequency
-
Spread operations over time
Invalid Data
Symptoms: Response contains "422" or validation errors
Solutions:
-
Review Request Data for invalid values
-
Check field mappings
-
Ensure required Shopify fields are populated
Connection Error
Symptoms: Response is empty or contains timeout message
Solutions:
-
Check internet connectivity
-
Verify API Url is correct
-
Check firewall settings
Log Maintenance
Task 1: Delete Old Entries
-
Choose the 🔎 icon, enter Shopify Log Entries, and then choose the related link.
-
Press Delete Entries Older Than 7 Days

-
Press Yes to confirm.
-
All log entries older than 7 days will be deleted.
Note: You can change the number of days by modifying the action parameter.
Task 2: Delete All Entries
-
In Shopify Log Entries list, press Delete All Entries
-
Press Yes to confirm.
-
All log entries will be deleted.
Warning: This action cannot be undone. Export important logs before deleting.
Troubleshooting with Logs
Scenario 1: Order Not Importing
Steps:
-
Open Shopify Log Entries
-
Filter by Created = today
-
Look for entries with Request Type = POST containing "order" or "fulfillment"
-
Open log entry and check:
-
Request Data - Verify query parameters and filters
-
Response Data - Check if orders were returned by Shopify
-
-
Common issues:
-
Response shows empty orders array → No orders match filters
-
Error in response → Check error message for details
-
Order already has JML Shopify Document ID → Already imported
-
Scenario 2: Item Export Failing
Steps:
-
Open Shopify Log Entries
-
Filter by Type = Error
-
Look for entries with "product" or "variant" in request
-
Open log entry and check Response Data for error details
-
Common issues:
-
"Collection not found" → Item Category not mapped to Shopify Collection
-
"Invalid price" → Price is negative or zero
-
"SKU already exists" → Duplicate SKU in Shopify
-
Scenario 3: Customer Not Created
Steps:
-
Open Shopify Log Entries
-
Look for POST requests with "customer" in request
-
Check Response Data for:
-
Success → Customer created, check if email matches
-
Error → Review error message (e.g., "Email already taken")
-
Best Practices
-
Regular Monitoring:
-
Review error logs daily
-
Set Logging Mode = Error Only in production
-
Delete old logs periodically
-
-
Troubleshooting:
-
Switch to Logging Mode = All when investigating issues
-
Export important logs before deleting
-
Compare successful vs. failed requests
-
-
Performance:
-
Keep log table size under control
-
Delete logs older than 30 days
-
Disable logging only if absolutely necessary
-
-
Security:
-
Logs may contain sensitive data (customer info, prices)
-
Restrict access to Shopify Log Entries page
-
Follow data retention policies
-
Common Issues
Problem: Log entries not created
Solution:
-
Check Logging Mode is not Disabled
-
Verify user has permissions for "JML Shopify Log Entry" table
-
Check if Job Queue is running with correct user credentials
Problem: Request/Response data shows "(BLOB)" but JSON viewer is empty
Solution:
-
Data may be corrupted
-
Try Download Request/Response to save as file
-
Check if log entry was created during system upgrade
Problem: Too many log entries, database growing
Solution:
-
Switch Logging Mode from All to Error Only
-
Run Delete Entries Older Than 7 Days regularly
-
Set up automated cleanup job
Problem: Cannot find logs for specific operation
Solution:
-
Check Created date filter
-
Check User ID - logs are recorded with the user who triggered action
-
Check if Logging Mode was Disabled at the time