Setup & Configuration
Configure Job Queue Admin using the Job Queue Admin Setup page. This guide covers all configuration options for administrators.
Accessing Job Queue Admin Setup
-
Choose the magnifier icon
-
Enter Job Queue Admin Setup
-
Choose the related link
-
Job Queue Admin Setup page opens
Or use the Tell Me search (Alt+Q) and type "Job Queue Admin Setup".
First-Time Setup
Step 1: Privacy Acknowledgment
Before enabling Job Queue Admin, you must acknowledge the data privacy terms:
-
Open Job Queue Admin Setup
-
In the Privacy section, click Privacy Policy to review the JEMEL Privacy Policy (see the Job Queue Admin section for data access, processing, and storage details)
-
Toggle Data Privacy Acknowledged to Yes
The system automatically records your User ID and the date of acknowledgment. This is required for GDPR compliance and must be completed before the extension can be enabled.

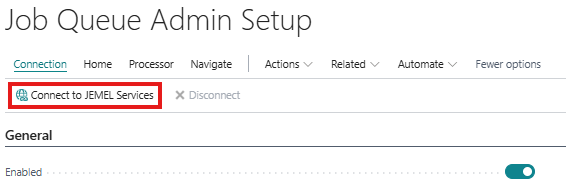
Step 2: Connect to JEMEL Services (Auto-Enables Extension)
To enable the extension and interactive features (Teams/Slack notifications with action buttons), connect to JEMEL Services:
-
Click Connect to JEMEL Services
-
A sign-in popup appears - sign in with an admin account
-
Review and Accept the Microsoft permissions
-
The popup closes and BC asks: "A user named JEMEL Job Queue Admin will be created. Do you want to continue?"
-
Click Yes to confirm
-
You should see "Connected" status change to Yes
-
Middleware test runs automatically - after successful connection, the system tests the middleware and shows the result
What Happens During Connect:
The Connect process performs several actions to set up secure API access:
| Step | What Happens | Why It's Needed |
|---|---|---|
| 1. OAuth Admin Consent | Opens Microsoft sign-in to grant admin consent for JEMEL's app | Authorizes JEMEL to access your BC tenant |
| 2. AAD Application Created | Registers JEMEL app in your BC's Microsoft Entra Applications list | Creates the service principal entry in BC |
| 3. System User Created | Creates a BC user named "JEMEL Job Queue Admin" (License Type: Application) | Required for API authentication |
| 4. Permission Sets Assigned | Assigns two permission sets to the app (see table below) | Grants minimal permissions needed for API operations |
| 5. Middleware Registration | Registers your tenant with JEMEL's notification middleware | Enables Layer 3 polling for reliable notification delivery |
| 6. Auto-Test Middleware | Automatically tests the middleware connection | Verifies everything works, updates "Connection Tested" status |
| 7. Enable Extension | Sets Enabled to Yes | Extension starts monitoring job queue errors |
| 8. Enable Azure Polling | Sets Azure Polling Enabled to Yes | Automatically enables Layer 3 delivery |
Permission Sets Assigned:
| Permission Set | Type | Purpose |
|---|---|---|
| JML JQA Admin | Custom (from extension) | Access to Job Queue Admin tables, pages, and codeunits |
| D365 AUTOMATION | BC Built-in | Execute permission for base codeunits required by API bound actions |
Why D365 AUTOMATION is Required:
When the middleware marks a notification as sent via the API, BC's internal event subscribers (like Master Data Management) are triggered. The D365 AUTOMATION permission set grants execute permission on these base codeunits, allowing the API to complete successfully. This is a standard BC permission set designed for automated/background processes.
Important Notes:
-
The system user confirmation is a standard BC security feature - it ensures you know a service principal is being created
-
If you click No on the user creation prompt, the connection is cancelled with a friendly message
-
The "JML JQA Admin" permission set grants access to Job Queue Admin-specific objects only
-
The "D365 AUTOMATION" permission set is a BC built-in set with limited scope for automated processes
-
No business data or credentials are sent to external services
If Connection Fails:
| Issue | Solution |
|---|---|
| Popup blocked | Allow popups for Business Central, or use "Connect via Hyperlink" fallback |
| User declined confirmation | Click Connect again and confirm the user creation |
| Permission errors | Ensure you have SUPER or SECURITY permission set |
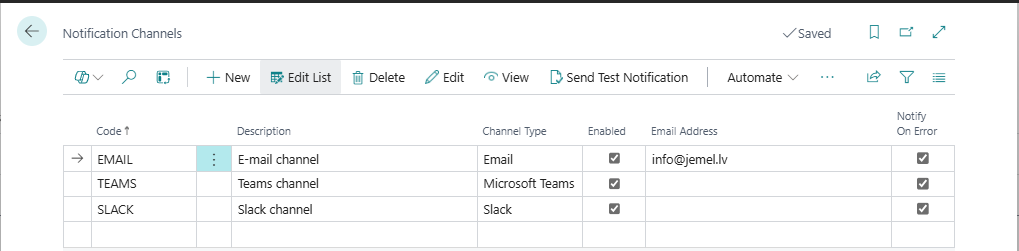
Step 3: Configure Notification Channels
After connecting, the extension is enabled and monitoring job queue errors. Now configure where notifications are sent:
-
Go to Actions > Navigate > Notification Channels
-
Create at least one channel (Email or Teams recommended)
-
Test the channel using Send Test Notification action
What Happens Automatically:
-
Extension starts monitoring job queue errors (enabled on Connect)
-
Notification Processor job is created automatically
-
Processor status shows "Ready" in the setup page
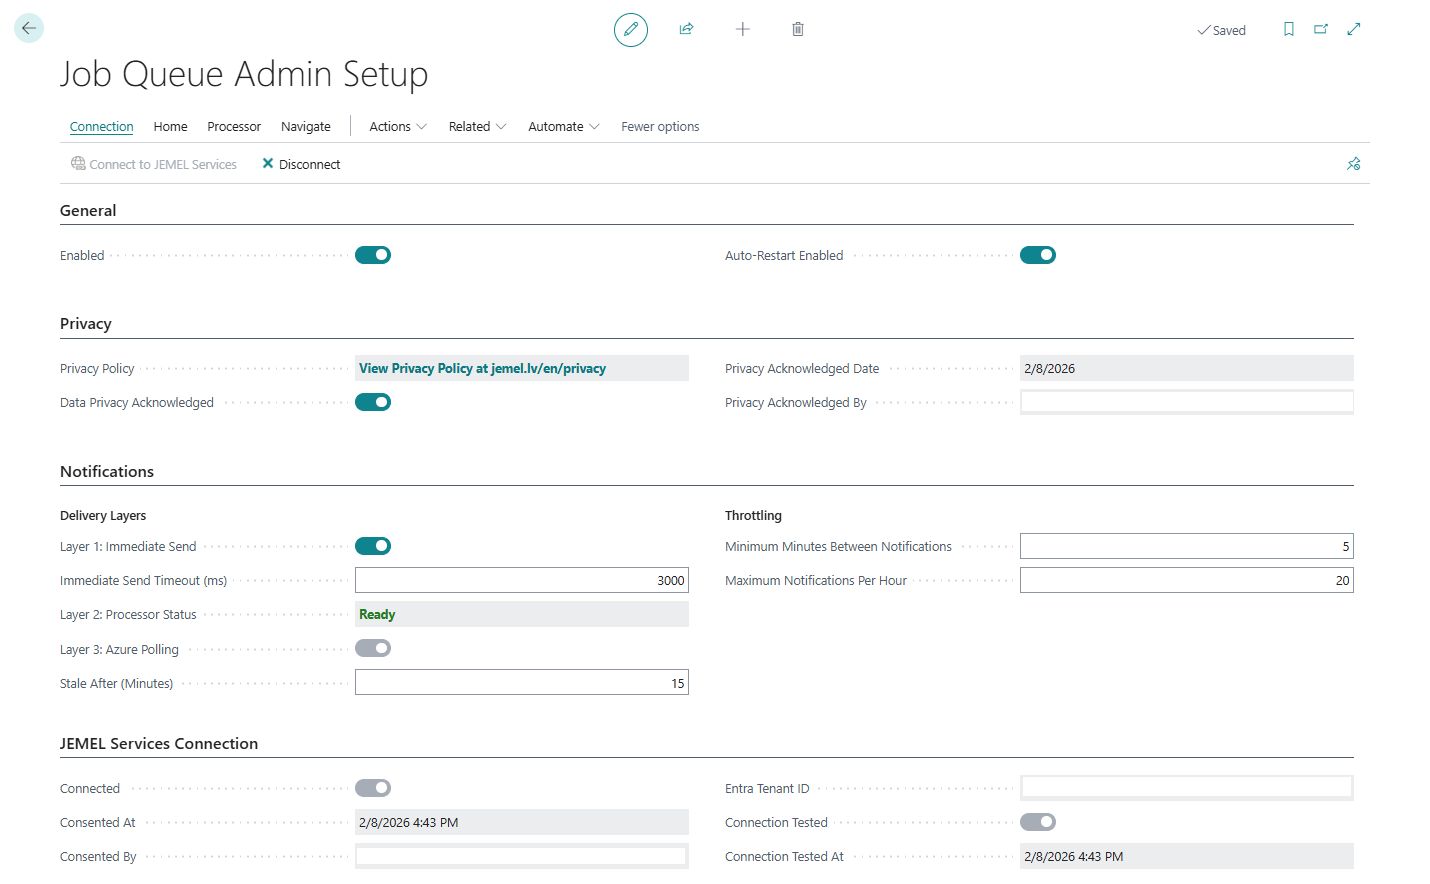
Setup Page Structure
The Job Queue Admin Setup page contains several FastTabs:
General FastTab
| Field | Description |
|---|---|
| Enabled | Master switch for the entire extension |
| Auto-Restart Enabled | Enable automatic job restarts based on restart rules |
Privacy FastTab
| Field | Description |
|---|---|
| Data Privacy Acknowledged | Shows if privacy terms accepted |
| Privacy Acknowledged Date | Date of acknowledgment |
| Privacy Acknowledged By | User who acknowledged |
Notifications FastTab
This section combines delivery layers and throttling settings.
Delivery Layers
| Field | Description | Editable |
|---|---|---|
| Layer 1: Immediate Send | Enable/disable direct sending when job fails | Yes (toggle) |
| Immediate Send Timeout Ms | HTTP timeout in milliseconds | Yes |
| Layer 2: Processor Status | Shows queue processor status (Ready, On Hold, Not Created) | No (read-only) |
| Layer 3: Azure Polling | Shows if Azure middleware polling is active | No (read-only) |
| Stale Notification Minutes | Minutes before Layer 3 picks up stale notifications | Yes |
Layer Control:
-
Layer 1: Toggle on/off with the switch
-
Layer 2: Control with Start/Stop Processor actions
-
Layer 3: Automatically enabled on Connect, disabled on Disconnect
Throttling
| Field | Description | Default |
|---|---|---|
| Min Minutes Between Notifications | Minimum gap between notifications for same job | 5 |
| Max Notifications Per Hour | Maximum notifications per job per hour | 20 |
Notification Processor (Layer 2)
The Notification Processor is a background job that handles notifications that couldn't be sent immediately (Layer 2 delivery).
Processor Status Meanings (shown in Notification Layers section):
-
Ready / In Process: Processor is running and handling queued notifications
-
On Hold: Processor is paused, queued notifications will wait
-
Not Created: No processor job exists yet (enable extension to create)
-
Not Found: Job was deleted externally, use Start Processor to recreate
How It Works
-
When a job queue fails, the extension tries immediate send (Layer 1)
-
If immediate send fails (timeout, network issue), the notification is queued
-
The Notification Processor job runs every 5 minutes to retry queued notifications
-
Failed sends are retried with exponential backoff (1min, 2min, 4min, etc.)
Automatic Creation
The processor job is automatically created when you enable the extension. No manual setup required.
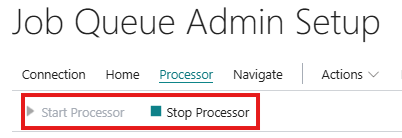
Manual Control
Use the Start Processor and Stop Processor actions in the Setup page:
| Action | Effect |
|---|---|
| Start Processor | Creates the job if missing, or sets status to Ready |
| Stop Processor | Sets the job status to On Hold (pauses processing) |
When to Stop the Processor:
-
During maintenance or debugging
-
When testing channel configurations
-
When you want to batch notifications
When to Restart:
-
After making configuration changes
-
After resolving notification issues
-
To resume normal operation
Monitoring the Queue
To see pending notifications:
-
Search for Notification Queue
-
View Status, Attempt Count, and Next Attempt time
-
Use Process Queue action to manually process entries
Notification Layer Configuration
Layer 1: Immediate Send
Purpose: Fastest notification path - sends directly when job fails.
Configuration:
-
Immediate Send Enabled: Set to Yes (default)
-
Immediate Send Timeout Ms: HTTP timeout in milliseconds (default: 3000)
When to Adjust:
-
Increase timeout if external services are slow
-
Disable if you prefer queue-only delivery
-
Keep enabled for fastest alerting
Layer 2: Queue Processing
Purpose: Reliable delivery with retry capability.
Configuration:
-
Queue entries processed by the Notification Processor job (runs every 5 minutes)
-
Use Start/Stop Processor actions to control the processing job
When to Adjust:
-
Always keep processor running for reliability
-
Works as fallback when immediate send fails
-
Handles retry logic with exponential backoff
Layer 3: Azure Polling (Safety Net)
Purpose: Safety net that catches notifications missed by Layer 1 and Layer 2.
Configuration:
-
Azure Polling Enabled: Read-only status field - automatically set to Yes when you connect to JEMEL Services, and No when you disconnect
-
Stale Notification Minutes: How old a notification must be before Layer 3 picks it up (default: 15)
-
Azure middleware polls every 30 minutes
-
Note: This field cannot be toggled manually - it reflects the connection state
When This Runs:
-
Only if notification is older than Stale Notification Minutes
-
Most notifications (90%+) delivered by Layer 1/2 before this runs
-
Acts as insurance against BC Job Queue failures
Multi-Company Configuration
Job Queue Admin uses tenant-wide data - most settings are shared across all companies in your Business Central tenant.
What This Means
-
Single setup: Configure once in any company, applies to all
-
Unified queue: All company notifications go to one queue
-
Consolidated log: View history from all companies in one place
-
Single processor: One Job Queue Entry handles all notifications
Company Filter Feature
Channels, restart rules, maintenance windows, and digest schedules support optional Company Filter:
-
Empty filter: Applies to all companies (default)
-
Company list: Comma-separated company names (e.g., "CRONUS,FABRIKAM")
-
Partial match: Filters use contains matching
Example: Create a Teams channel only for production companies:
-
Create notification channel "TEAMS-PROD"
-
Set Company Filter to "PROD,PRODUCTION"
-
Only companies with "PROD" or "PRODUCTION" in their name will use this channel
Per-Company Settings
The Job Configuration table remains per-company because Job Queue Entries are themselves per-company. This allows:
-
Different notification settings per job per company
-
Company-specific overrides for shared channels
-
Granular control when needed
Throttling Configuration
Prevent notification storms with throttling settings:
Min Minutes Between Notifications
Purpose: Minimum time gap between notifications for the same job.
Field: Min Minutes Between Notification
Default: 5 minutes
How It Works:
-
If Job A fails at 10:00, notification sent
-
If Job A fails again at 10:03, notification suppressed
-
Next notification for Job A allowed at 10:05
When to Adjust:
-
Increase for jobs that fail frequently (reduce noise)
-
Decrease for critical jobs (faster alerting)
Max Notifications Per Hour
Purpose: Hard limit on notifications per job per hour.
Field: Max Notifications Per Hour
Default: 20
How It Works:
-
Counts notifications sent in rolling 60-minute window
-
Blocks new notifications when limit reached
-
Resets automatically as time passes
When to Adjust:
-
Decrease for non-critical jobs
-
Increase for jobs that legitimately fail often
Related Setup Pages
From Job Queue Admin Setup, you can access:
Notification Channels
Purpose: Configure where notifications are sent.
Access: Actions > Navigate > Notification Channels

Restart Rules
Purpose: Configure automatic restart patterns.
Access: Actions > Navigate > Restart Rules
Maintenance Windows
Purpose: Define quiet periods.
Access: Actions > Navigate > Maintenance Windows
Job Configurations
Purpose: Per-job notification settings.
Access: Actions > Navigate > Job Configurations
Validation & Testing
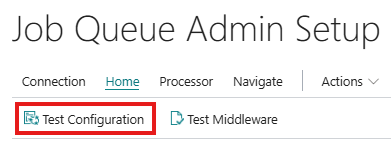
Test Setup Configuration
Use the Test Configuration action to validate your setup:
-
Open Job Queue Admin Setup
-
Click Test Configuration in the Actions menu
-
Review the test results
What Gets Tested:
-
Privacy acknowledgment status
-
Extension enabled status
-
At least one channel configured
-
Channel connectivity
Common Validation Errors
| Error | Cause | Solution |
|---|---|---|
| Privacy not acknowledged | Step 1 skipped | Click Acknowledge Privacy |
| No channels configured | No notification destinations | Create at least one channel |
| Channel test failed | Invalid channel settings | Check channel configuration |
Disconnecting from JEMEL Services
If you need to disconnect from JEMEL Services (e.g., to switch tenants, troubleshoot, or uninstall):
-
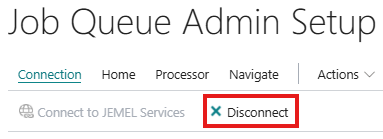
Open Job Queue Admin Setup
-
Click Disconnect from JEMEL Services
-
Confirm the disconnection
What Happens During Disconnect:
| Step | What Happens | Effect |
|---|---|---|
| 1. Middleware Unregistration | Removes your tenant from JEMEL's notification middleware | Layer 3 polling stops immediately |
| 2. Permission Sets Removed | Removes all permission sets (JML JQA Admin, D365 AUTOMATION) from the JEMEL app | App can no longer access BC data |
| 3. AAD Application Disabled | Disables (not deletes) the app in Microsoft Entra Applications | Service principal is deactivated |
| 4. Azure Polling Disabled | Sets Azure Polling Enabled to No | Prevents confusion about Layer 3 state |
| 5. Local Settings Cleared | Resets connection status in Job Queue Admin Setup | Ready for fresh reconnection |
Important Notes:
-
Disconnect does not delete data - Your notification channels, rules, and logs are preserved
-
Disconnect does not uninstall - The extension remains installed and can be reconnected
-
Layer 1 & 2 continue working - Direct notifications (Email) still work after disconnect
-
Layer 3 stops - Azure polling/middleware features require reconnection
When to Disconnect:
-
Troubleshooting connection issues
-
Switching to a different tenant
-
Before uninstalling the extension
-
Security review or audit requirements
Reconnecting After Disconnect:
Simply click Connect to JEMEL Services again. The process will:
-
Re-enable the existing AAD Application (if present)
-
Reassign both permission sets (JML JQA Admin and D365 AUTOMATION)
-
Re-register with the middleware
Best Practices
Initial Setup
-
Start with Email: Most reliable channel for testing
-
Test before enabling: Use Test Configuration
-
Enable one channel first: Verify delivery works
-
Add channels gradually: Don't configure everything at once
Throttling Settings
-
Start with defaults: 5 minutes / 20 per hour
-
Monitor notification log: Check for suppressed notifications
-
Adjust per job type: Use Job Configurations for specific jobs
Production Recommendations
| Setting | Development | Production |
|---|---|---|
| Immediate Send Timeout | 5000ms | 3000ms |
| Min Minutes Between Ntf | 1 | 5-10 |
| Max Notifications Per Hour | 50 | 10-20 |
Next Steps: Configure your first Notification Channel to start receiving alerts.