Setting Up A Workflow
Create a workflow that automatically sends Notify User notifications when business events occur.
Option A: Enable a Pre-Built Template
The quickest way to get started. Notify User ships with ready-to-use templates.
Step 1: Open Workflows
-
In Business Central, search for Workflows in the Tell Me bar
-
Open the Workflows page
Step 2: Find the Template
-
Click New Workflow from Template in the action bar
-
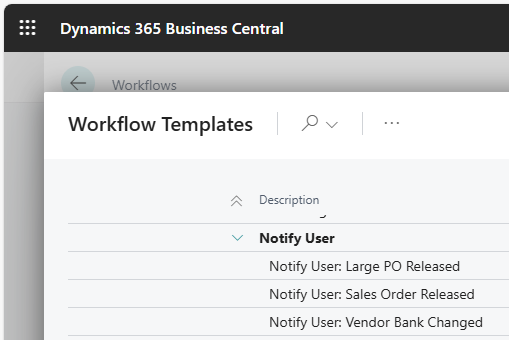
In the template list, look for templates under the Notify User category:
-
Notify User: Sales Order Released
-
Notify User: Vendor Bank Changed
-
Notify User: Large PO Released
-
-
Select a template and click OK
Step 3: Configure Response Options
-
The workflow is created with the event and response pre-configured
-
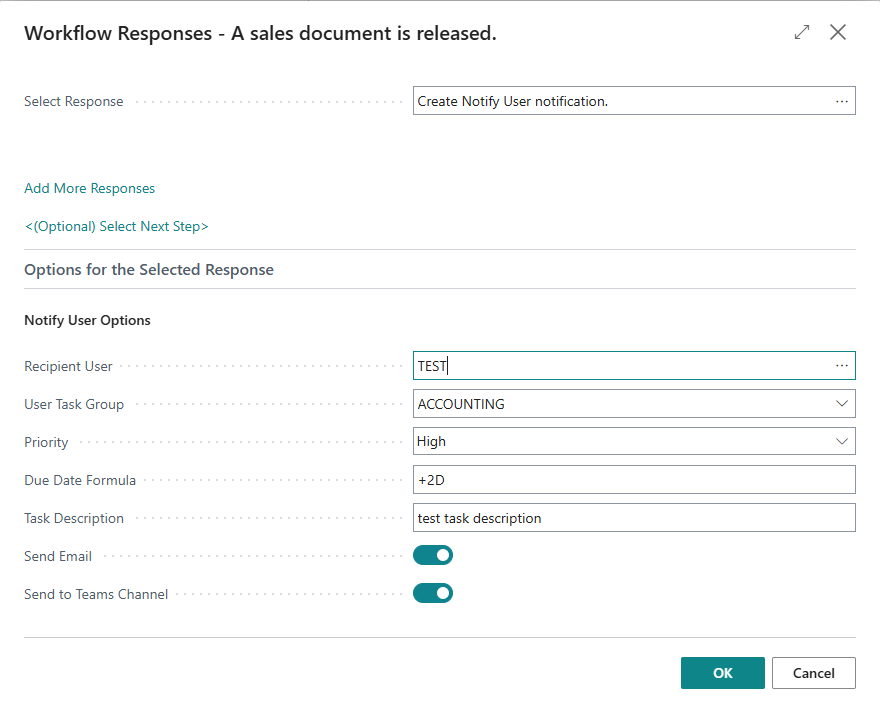
Click on the Then Response step to see the response details
-
In the Response Options area, configure:
Field | Description |
|---|---|
Recipient User | The specific user who should receive the task. Use the lookup to select a user. |
User Task Group | The user task group that should receive the task. You can set both a user and a group. |
Priority | Priority for the created task: Low, Normal (default), or High. |
Due Date Formula | When the task is due. For example, |
Task Description | The text that appears in the User Task description. If left empty, defaults to a description of the source record. |
Send Email | Check to send an email notification to recipients. Requires Plus subscription. |
Send to Teams Channel | Check to post a notification to the group's Teams channel webhook. Requires Plus subscription and a configured webhook URL on the User Task Group. |
You must configure at least a Recipient User or a User Task Group (or both). If neither is set, no notification will be created when the workflow fires.
Step 4: Adjust Conditions (Optional)
-
Click on the When Event step to see event conditions
-
Adjust the default condition if needed (e.g., change the amount threshold for Large PO Released)
Step 5: Enable the Workflow
-
Toggle the Enabled switch to Yes
-
The workflow is now active
Option B: Create a Custom Workflow
For scenarios not covered by the templates, create your own workflow from scratch.
Step 1: Create a New Workflow
-
Open the Workflows page
-
Click New to create a blank workflow
-
Enter a Code (e.g.,
NU-CUSTOM-01) and Description
Step 2: Add a Workflow Event
-
In the When Event column, click to select an event
-
Choose from any available BC workflow event, for example:
-
A sales document is released
-
A purchase document is released
-
A vendor record is changed
-
A customer record is changed
-
An approval request is approved
-
Events from other installed extensions
-
-
Optionally set Conditions by clicking the event conditions link. This lets you filter when the workflow fires (e.g., only for Document Type = Order, or only when a specific field changes).
Step 3: Add the Notify User Response
-
In the Then Response column, click to select a response
-
Choose Create Notify User Notification
-
Configure the Response Options as described in Option A, Step 3
Step 4: Enable the Workflow
-
Toggle Enabled to Yes
-
Test by triggering the event (e.g., release a sales order)
-
Verify the User Task was created and notifications delivered
Response Options Reference
Field | Type | Default | Description |
|---|---|---|---|
Recipient User | Lookup | (empty) | Individual user to notify. If empty, only group notification is created. |
User Task Group | Lookup | (empty) | Group to notify. Creates a group task with the Original Group preserved for claim workflow. |
Priority | Option | Normal | Low, Normal, or High. Sets the priority on the created User Task. |
Due Date Formula | DateFormula | (empty) | Calculated from the date the workflow fires. Examples: |
Task Description | Text | (empty) | If empty, defaults to the source record description (e.g., "Sales Header: Order, SO-1042"). |
Send Email | Boolean | No | Sends email notification to the recipient. Requires Plus subscription. Uses the same email format as manual notifications. |
Send to Teams Channel | Boolean | No | Posts to the Teams channel webhook configured on the User Task Group. Requires Plus subscription. |
Template Details
Sales Order Released
-
Event: A sales document is released
-
Default condition: Document Type = Order
-
Typical use: Warehouse team picks new orders. Configure the response with your warehouse User Task Group and enable Send to Teams Channel for instant visibility.
Vendor Bank Changed
-
Event: A vendor record is changed
-
Default condition: Monitor bank-related field changes
-
Typical use: Fraud prevention. The CFO or AP manager receives an immediate notification with a link to the vendor card when bank details are modified. Set Priority to High.
Large Purchase Order Released
-
Event: A purchase document is released
-
Default condition: Document Type = Order (configure amount threshold in event conditions)
-
Typical use: Finance oversight for large purchases. Complements BC's built-in approval workflows. The manager is notified without blocking the process. Set the Amount condition to your organization's threshold (e.g., > 5000).
What Happens When a Workflow Fires
When the configured event occurs and conditions are met:
-
User Task is created with:
-
Title set from the source record (e.g., "Sales Header: Order, SO-1042")
-
Description from the Task Description field (or default)
-
Source record link for Go To Source Record navigation
-
Priority and due date from the response options
-
Assigned to the configured user and/or group
-
-
Email is sent (if enabled and Plus subscription active) using the same format as manual notifications
-
Teams channel message is posted (if enabled, Plus subscription active, and group has a webhook URL) using the same Adaptive Card format as manual notifications
The created User Task supports all existing features: read receipts, claim workflow, source notes FactBox, and sent notifications tracking.
Troubleshooting
| Issue
|
Solution
| | --- | --- | |
Workflow not firing
|
Verify the workflow is Enabled. Check that the event conditions match what you expect.
| |
No task created
|
Ensure at least a Recipient User or User Task Group is configured in the response options.
| |
Email not sent
|
Verify Plus subscription. Check that the recipient user has a Contact Email set.
| |
Teams message not posted
|
Verify Plus subscription. Check that the User Task Group has a Teams Webhook URL configured (see Teams Setup).
| |
Wrong task priority
|
Check the Priority field in the response options. Default is Normal.
| |
Template not visible
|
Templates appear when you use New Workflow from Template. If templates are missing, they may need to be initialized. Open the Workflow Setup page to trigger template creation.
| |
"Create Notify User Notification" not in response list
|
The response is registered when the Notify User extension is installed. If missing, restart the BC server instance.
|