Purchase Document Integration
Add assets to Purchase Orders to automatically transfer custody with vendors during receipts, returns, and repair workflows.

Understanding Purchase Integration
What is Purchase Document Integration?
Purchase Document Integration = Automatic asset transfer to/from vendors during purchase document posting
How It Works:
-
Add asset lines to Purchase Order (alongside item lines)
-
Post Purchase Receipt
-
Asset automatically transfers Vendor → Location
-
Holder Entries created
-
Complete audit trail
Business Value: Assets in vendor custody (repair, storage) automatically tracked without manual processes
Purchase Document Flows
Inbound Flow (From Vendor)
Purchase Order → Purchase Receipt
1. Create Purchase Order 2. Add Asset Lines (assets receiving from vendor) 3. Post Receipt 4. AUTOMATIC: Asset transfers Vendor → Location 5. Holder Entries created 6. Posted Receipt Asset Lines created
Use Cases: Receiving repaired assets, purchased assets, assets from vendor storage
Outbound Flow (To Vendor)
Purchase Return Order → Return Shipment
1. Create Purchase Return Order 2. Add Asset Lines (assets returning to vendor) 3. Post Return Shipment 4. AUTOMATIC: Asset transfers Location → Vendor 5. Holder Entries created 6. Posted Return Shipment Asset Lines created
Use Cases: Sending assets to vendor for repair, returning defective assets, vendor storage
Adding Asset Lines to Purchase Documents
Purchase Asset Lines Subpage
Purchase documents have a separate Asset Lines subpage:
Location: Below main Lines subpage
Purpose: Add assets that will transfer on posting
Fields:
-
Asset No. (required)
-
Asset Description (auto-filled)
-
Quantity to Receive/Ship (default 1)
-
Reason Code (optional but recommended)
-
Description (optional)

Step-by-Step: Adding Asset Lines
Scenario: Receiving 5 repaired laptops from vendor
Step 1: Create Purchase Order
-
Create new Purchase Order
-
Vendor: V-001 (Repair Shop)
-
Location Code: WAREHOUSE (where to receive)
Step 2: Navigate to Asset Lines
-
Scroll below main Lines section
-
Find Asset Lines subpage
-
Click in first asset line
Step 3: Add First Asset
-
Asset No.: LAPTOP-001
-
Asset Description auto-fills
-
Quantity to Receive: 1 (default)
-
Reason Code: REPAIR
-
Description: "Repair complete - battery replaced"
Step 4: Add More Assets
-
Repeat for LAPTOP-002 through LAPTOP-005
-
All with Reason: REPAIR
-
Individual descriptions for each
Step 5: Save
-
Purchase Order now has 5 asset lines
-
Ready to receive
Asset Line Fields
Asset No. (Required)
Purpose: Asset being received from or sent to vendor
Purchase Order: Asset must be at Vendor (receiving from)
Purchase Return: Asset must be at Location (returning to vendor)
Lookup: Yes (filtered appropriately)
Validation:
-
Asset must exist
-
Asset must not be blocked
-
Asset must not have parent
-
Asset must be at correct holder
Quantity to Receive/Ship
Purpose: Quantity to receive (Purchase Order) or ship (Return Order)
Default: 1
Range: 0 or 1 (assets are unique)
Use 0: To skip receiving/shipping this asset
Quantity Received/Shipped (Read-Only)
Purpose: Track received/shipped quantities
Auto-Updated: On posting
Use: Verify what's been processed
Reason Code (Optional)
Purpose: Why asset with vendor
Common Codes:
-
REPAIR - Asset at vendor for repair
-
RETURN - Returning defective asset
-
STORAGE - Vendor storage/custody
-
PURCHASE - Receiving purchased asset
-
MAINTENANCE - Scheduled maintenance
Benefit: Reporting by reason, clear audit trail
Description (Optional)
Purpose: Line-specific notes
Examples:
-
"Repair complete - battery and screen replaced"
-
"RMA-12345 - defective motherboard"
-
"Scheduled annual maintenance"
Posting Purchase Receipt
Before Posting
Verify:
-
Asset lines added
-
Location Code set (receive-to location)
-
Quantities correct
-
Reason codes set
-
Assets currently at Vendor
Check Asset Current Holder:
-
Must be at Buy-from Vendor
-
Use Asset Card to verify
How to Post
Step 1: Post Receipt
-
Open Purchase Order
-
Click Post or press F9
-
Select Receive
-
Click OK
Step 2: Automatic Processing
-
BC posts purchase receipt (standard)
-
Asset Pro intercepts posting event
-
Creates temp Asset Journal lines
-
Posts journal (creates Holder Entries)
-
Updates asset Current Holder
-
Creates Posted Receipt Asset Lines
Step 3: Confirmation
-
Receipt posted message
-
Posted Receipt No. shown
What Happens to Assets
For Each Asset Line:
-
Holder Entries Created:
-
Transfer Out: Vendor → (leaving)
-
Transfer In: Location (arriving)
-
Transaction No. links them
-
Document No. = Posted Receipt No.
-
-
Asset Updated:
-
Current Holder Type = Location
-
Current Holder Code = Location Code (from header)
-
Current Holder Since = Posting Date
-
-
Posted Asset Line Created:
-
Posted Receipt Asset Line
-
References asset and receipt
-
Permanent record
-
Undoing Purchase Receipt
When to Undo Receipt
Undo Receipt = Reverse a posted purchase receipt to return asset to vendor
Common Scenarios:
-
Asset received in error
-
Wrong asset received from vendor
-
Asset needs to go back to vendor immediately
-
Receipt posted to wrong location
-
Need to modify Purchase Order details
-
Asset quality issue discovered immediately
Important: Undo must happen BEFORE invoicing
How Undo Works
The Undo Process:
-
Validation Checks:
-
Receipt not already undone
-
Asset exists and not blocked
-
Purchase Order still exists (not yet invoiced and deleted)
-
Asset currently at location (holder validation)
-
-
Reversal Steps:
-
Create correction line in Posted Receipt
-
Reverse holder entries (Location → Vendor)
-
Update Purchase Order line (reduce Quantity Received)
-
Mark original line as corrected
-
-
Result:
-
Asset back at vendor
-
Purchase Order reopened for modification
-
Complete audit trail preserved
-
Step-by-Step: Undoing Receipt
Scenario: Received wrong asset, need to undo receipt
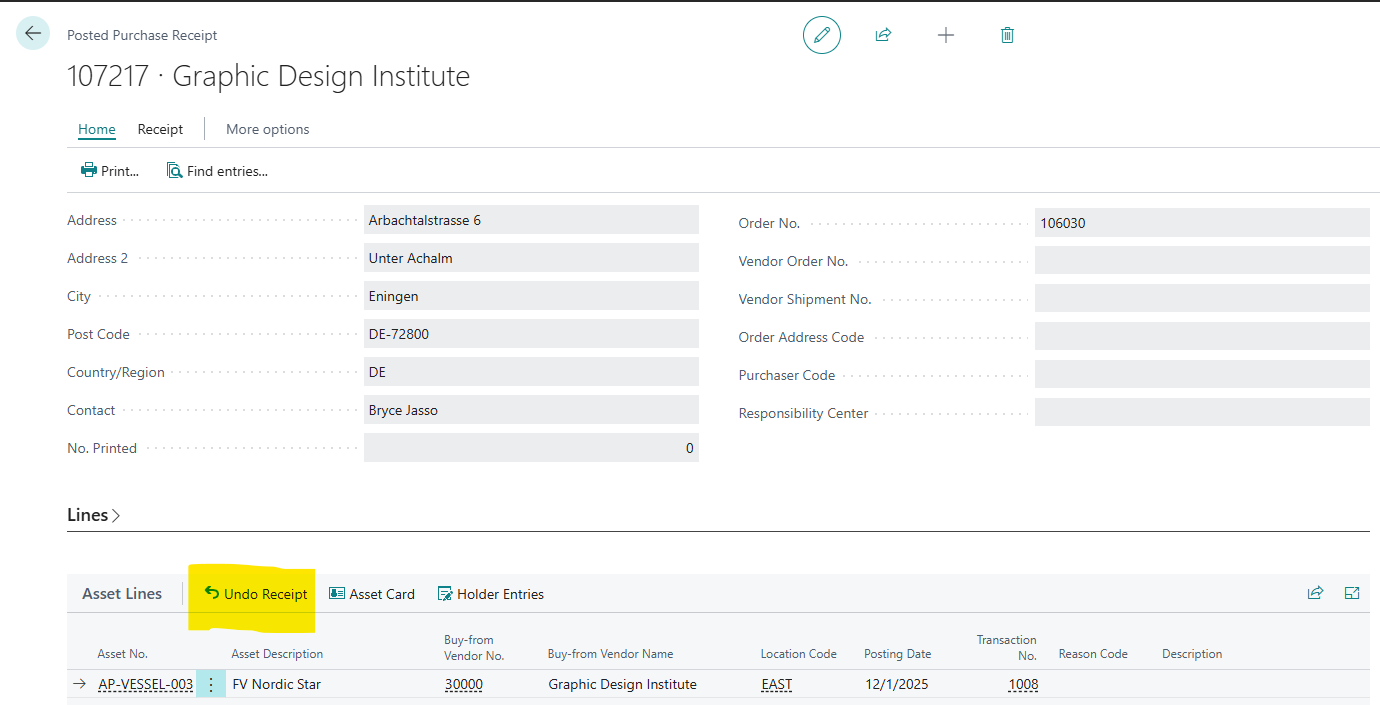
Step 1: Open Posted Receipt
-
Search "Posted Purchase Receipts"
-
Find receipt to undo (e.g., 107001)
-
Open the document
Step 2: Navigate to Asset Lines
-
Scroll to Asset Lines subpage
-
Find asset line to undo (e.g., LAPTOP-001)
Step 3: Execute Undo
-
Select the asset line
-
Click Undo Receipt action
-
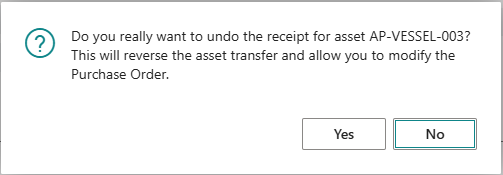
Confirmation dialog appears:
-
"Do you really want to undo the receipt for asset LAPTOP-001?"
-
"This will reverse the asset transfer and allow you to modify the Purchase Order."
-
-
Click Yes
Step 4: Processing
-
Dialog: "Checking asset receipt line..."
-
Dialog: "Undoing asset receipt..."
-
Message: "Asset receipt undone successfully."
Step 5: Verify Results
-
Posted Receipt: Correction line created
-
Asset Card: Current Holder back to Vendor
-
Purchase Order: Asset line Quantity Received reduced
-
Holder Entries: Reversal entries created
What Happens During Undo
Posted Receipt Changes:
-
Original line marked with "Correction" flag
-
New correction line inserted below original
-
Correction line has:
-
Same asset information
-
Reference to original line
-
Today's date as Posting Date
-
New transaction number
-
Asset Changes:
-
Current Holder Type: Location → Vendor
-
Current Holder Code: Updated to vendor
-
Current Holder Since: Updated to undo date
Holder Entries Created:
-
Transfer Out: Location (reversing original Transfer In)
-
Transfer In: Vendor (reversing original Transfer Out)
-
Document No.: RECEIPTNO-UNDO
-
Linked by new Transaction No.
Purchase Order Reopened:
-
Asset line Quantity Received reduced by 1
-
Line available for modification
-
Can be re-received or removed
Validation Rules for Undo
Cannot Undo If:
-
Already Undone:
-
Error: "This asset receipt has already been reversed."
-
Check: Original line has Correction flag
-
-
Asset Blocked:
-
Error: "Asset LAPTOP-001 is blocked."
-
Solution: Unblock asset first
-
-
Purchase Order Not Found:
-
Error: "Purchase Order PO-001 line 10000 not found. Cannot undo receipt."
-
Cause: Order was invoiced and deleted
-
Solution: Cannot undo after full invoicing
-
-
Asset Not at Location:
-
Error: "Cannot undo receipt. Asset LAPTOP-001 current holder does not match the receipt location."
-
Cause: Asset was manually transferred elsewhere
-
Solution: Transfer asset back to location first, then undo
-
Undo vs. Return Shipment
Two Ways to Send Asset Back to Vendor:
Undo Receipt:
-
Use when: Receipt was in error
-
Timing: Before invoicing
-
Effect: Reverses original receipt
-
Result: Purchase Order reopened
-
Best for: Immediate corrections, wrong asset received
Return Shipment (Purchase Return Order):
-
Use when: Legitimate return after receipt
-
Timing: After invoicing (typically)
-
Effect: New return transaction
-
Result: Separate return document
-
Best for: Defective returns, sending for repair
Choose Undo: For immediate corrections before invoicing
Choose Return: For normal business return/repair process
Troubleshooting Undo
Problem: Cannot Find Undo Action
Cause: Looking at wrong page
Solution:
-
Go to Posted Purchase Receipt (not Purchase Order)
-
Navigate to Asset Lines subpage
-
Select asset line
-
Look for Undo Receipt action
Problem: Undo Button Grayed Out
Cause: Line already undone
Solution: Check if Correction flag is set (line already reversed)
Problem: Holder Mismatch Error
Cause: Asset was manually moved after receipt
Solution:
-
Check Asset Card Current Holder
-
If not at location, determine why
-
Options:
-
Transfer asset back to location manually
-
Then undo receipt
-
OR: Accept current state and don't undo
-
Problem: Purchase Order Not Found Error
Cause: Order was fully invoiced and deleted
Solution:
-
Cannot undo after full invoicing
-
Use Purchase Return Order for return processing instead
-
Undo only works while Order still exists
Posted Purchase Receipt Asset Lines
What Are They?
Posted Receipt Asset Lines = Permanent record of assets received
Location: Posted Purchase Receipt → Asset Lines subpage
Fields:
-
Asset No.
-
Asset Description
-
Vendor No.
-
Vendor Name
-
Location Code
-
Location Name
-
Reason Code
-
Description
-
Posting Date
-
Transaction No. (links to Holder Entries)
Purpose: Document-specific audit trail
Purchase Return Orders
Sending Assets to Vendor
Scenario: Sending laptops to vendor for repair
Step 1: Create Purchase Return Order
-
Create new Purchase Return Order
-
Vendor: V-001 (Repair Shop)
-
Location Code: WAREHOUSE (shipping from)
Step 2: Add Asset Lines
-
Navigate to Asset Lines subpage
-
Asset No.: LAPTOP-006 (needs repair)
-
Quantity to Ship: 1
-
Reason Code: REPAIR
-
Description: "Screen cracked - needs replacement"
Step 3: Validate
-
Asset must currently be at Location
-
Asset No. lookup filters to location's assets
Posting Return Shipment
Step 1: Post Shipment
-
Open Purchase Return Order
-
Click Post
-
Select Ship
-
Click OK
Step 2: Automatic Transfer
-
Asset transfers Location → Vendor
-
Holder Entries created
-
Posted Return Shipment Asset Lines created
Step 3: Result
-
Asset at Vendor custody
-
Complete outbound audit trail
Use Cases
Use Case 1: Repair Workflow (Complete Cycle)
Business Process: Laptop repair at vendor
Outbound (Send for Repair):
-
Purchase Return Order
-
Vendor: V-001 (Repair Shop)
-
Asset Line: LAPTOP-001
-
Reason: REPAIR
-
Description: "Battery issue"
-
External Doc No.: RMA-2024-001
-
Post Return Shipment
-
Result: LAPTOP-001 at Vendor V-001
Inbound (Receive After Repair):
-
Purchase Order
-
Vendor: V-001
-
Asset Line: LAPTOP-001
-
Reason: REPAIR
-
Description: "Repair complete - battery replaced"
-
External Doc No.: INV-REPAIR-12345
-
Post Receipt
-
Result: LAPTOP-001 back at Location WAREHOUSE
Complete Audit Trail: Both shipment and receipt documented with holder entries
Use Case 2: Receiving Purchased Assets
Business Process: Receiving newly purchased servers from vendor
Steps:
-
Purchase Order
-
Vendor: V-SUP-001 (Equipment Supplier)
-
Item Lines: 5 x Server (inventory)
-
Asset Lines: 5 assets (newly created assets for servers)
-
Reason: PURCHASE
-
Post Receipt
Result:
-
Inventory received (standard BC)
-
Assets received and at Location (Asset Pro)
-
Complete procurement trail
Use Case 3: Defective Return
Business Process: Returning defective equipment to vendor
Steps:
-
Purchase Return Order
-
Vendor: V-SUP-001
-
Asset Line: SRV-DEFECT-001
-
Reason: RETURN
-
Description: "Defective motherboard - DOA"
-
External Doc No.: RMA-VENDOR-789
-
Post Return Shipment
Result:
-
Asset at vendor for replacement/credit
-
RMA reference tracked
Use Case 4: Scheduled Maintenance at Vendor
Business Process: Annual maintenance performed by vendor
Outbound:
-
Purchase Return Order
-
Asset Lines: Equipment for maintenance
-
Reason: MAINTENANCE
-
Post Return Shipment
Inbound (After Maintenance):
-
Purchase Order
-
Asset Lines: Same equipment
-
Reason: MAINTENANCE
-
Description: "Annual maintenance complete"
-
Post Receipt
Result: Complete maintenance cycle tracked
Validation Rules
Adding Asset Lines
Purchase Order:
-
Asset must be at Vendor (Buy-from)
-
If asset not at vendor, error: "Asset must be at Vendor first"
Purchase Return Order:
-
Asset must be at Location
-
If asset not at location, error: "Asset must be at Location"
Common Rules:
-
Asset cannot be blocked
-
Asset cannot have parent
-
No duplicate assets on same document
Posting Validation
Rule: Quantity must be > 0
Rule: Asset must still be at correct holder
Rule: Location Code must be specified (Purchase Order)
Troubleshooting
Problem: Cannot Add Asset - Not in Lookup
Purchase Order:
-
Asset must be at Vendor (Buy-from)
-
Check Asset Current Holder
-
If at Location, manually transfer to Vendor first
Purchase Return Order:
-
Asset must be at Location
-
Check Asset Current Holder
-
If at Vendor, cannot add (already there)
Problem: Asset Not Transferred After Posting
Cause 1: Posted Invoice only (not Receipt/Shipment)
Solution: Receipt/Shipment triggers transfer
Cause 2: Quantity = 0
Solution: Set Quantity to Receive/Ship = 1
Problem: Wrong Location After Receipt
Cause: Incorrect Location Code on Purchase Order header
Solution:
-
Verify Location Code before posting
-
Asset goes to that location
Problem: Asset Still at Vendor After Receipt
Cause: Asset wasn't at Vendor before receipt
Solution: Asset must start at Vendor for receipt to work
Purchase Document Integration excels at repair workflow tracking. Create a standard repair process: Purchase Return Order (send to vendor) → Purchase Order (receive back), using consistent External Document Numbers for complete RMA traceability!